![[Mattwins]](https://blogger.googleusercontent.com/img/b/R29vZ2xl/AVvXsEgEy2dr7hX_nicvRhz4bxUFEoP_GPqBybD6lc0fwB83oIJo5s3tR3Qal9gBewkZ2l_egelA4NJ4SaMEWcs1l4QzdVYNdDcLO-8p8s4GEVdcMHt9xVrbDc2tGNaiOFFshWzgrUnPiNBUBfkU/s1600-r/logo2+-+Copy.png)
After running a much-loved-but-aging desktop with a GTX 660 and a CPU over a decade old, it was finally time for an upgrade. I got a great deal on a desktop with a middle-aged i5 and an AMD RX 580 graphics card - still nothing top shelf, but doubling the cores and over doubling the graphics processing power is nothing to scoff at.
Problem is, it might have had the speed, but it didn't have any style (that, and it sounded like a 747 about to take flight in my bedroom). Buying a better case and fans was the obvious choice, but this seemed like an opportunity to be unnecessarily thrifty and add some personality to the build.


Before I launch into the build details, a quick rundown of the specs and budget:
- Intel Core i5 3550 quad core CPU - definitely on the old side, but extremely stable and usable
- RX 580 GPU - Still arguably the best mid-tier graphics unit for the money
- 8 gigs RAM - 16 would certainly be nice, but 8 will suffice.
- 480 GB SSD, 1 TB HDD
- Antec 650w PSU
- Stylish, quiet form factor
Performance:
- UserBenchmark score of "Destroyer" for gaming, "Yacht" for desktop use, and "Jet ski" for workstation use
- ~50 FPS in AC Odyssey, 1080p ultra
- ~90 FPS in DOOM, 1080p ultra
- ~100 FPS in Fortnite, 1080p high/ultra
All in all, not a top tier rig, but better than most consoles and more than good enough for my needs. The total budget? Less than $300.
A quick Google search pulls up no shortage of creative PC cases, plenty from glass and metal, a decent amount made of wood, and a surprising amount of fire hazards cardboard cases. I didn't go for anything really wild, and stuck to a pretty traditional desktop design, but with some practical aesthetic choices and minimized as much as possible.

The goal from the start, as usual, was to build on as small a budget as possible. Including overbought materials, fans, sandpaper, and full cans of stain that I only used a little bit of, the costs are a little under $50. Including just the box and only as much stain and hardware as was actually used, the cost was under $15!

To make the entire case, I needed exactly one 2' x 4' x 3/8" piece of sanded plywood. I bought two because I wasn't sure beforehand if I could finesse all the pieces onto it. You could also use thicker wood for a little more strength and soundproofing, but it'll be a tad more expensive, harder to work with, and heavier, your call.

A cheap table saw made swift work of the thin panels.

Clamping supports to attach the sides to the bottom securely. I highly recommend Titebond II for most woodworking projects.

Starting the test-fitting process

Clamping the sides together was possibly the easiest part to mess up and attach everything skewed, but if you measure carefully and put interior supports in the right places it's not too bad.

Test-fitting the PSU. Because the power supply is pretty heavy, this was one of the more important parts to get just right (you certainly don't want it crashing down on your GPU and motherboard!). Fortunately after gluing large supports underneath and bolting it to the back, it's rock solid. For a slightly easier build, you could always put it on the bottom instead.


I built the top front panel at an angle to make the power button extra accessible, eliminate a little deadspace for marginally better airflow, and give it a little more personality than just a plain ol' box.

Time to fill the edges with trusty wood filler.

Once the wood filler dries, I sanded all the corners to give it a more finished look. This helped tremendously, more than the pictures show.

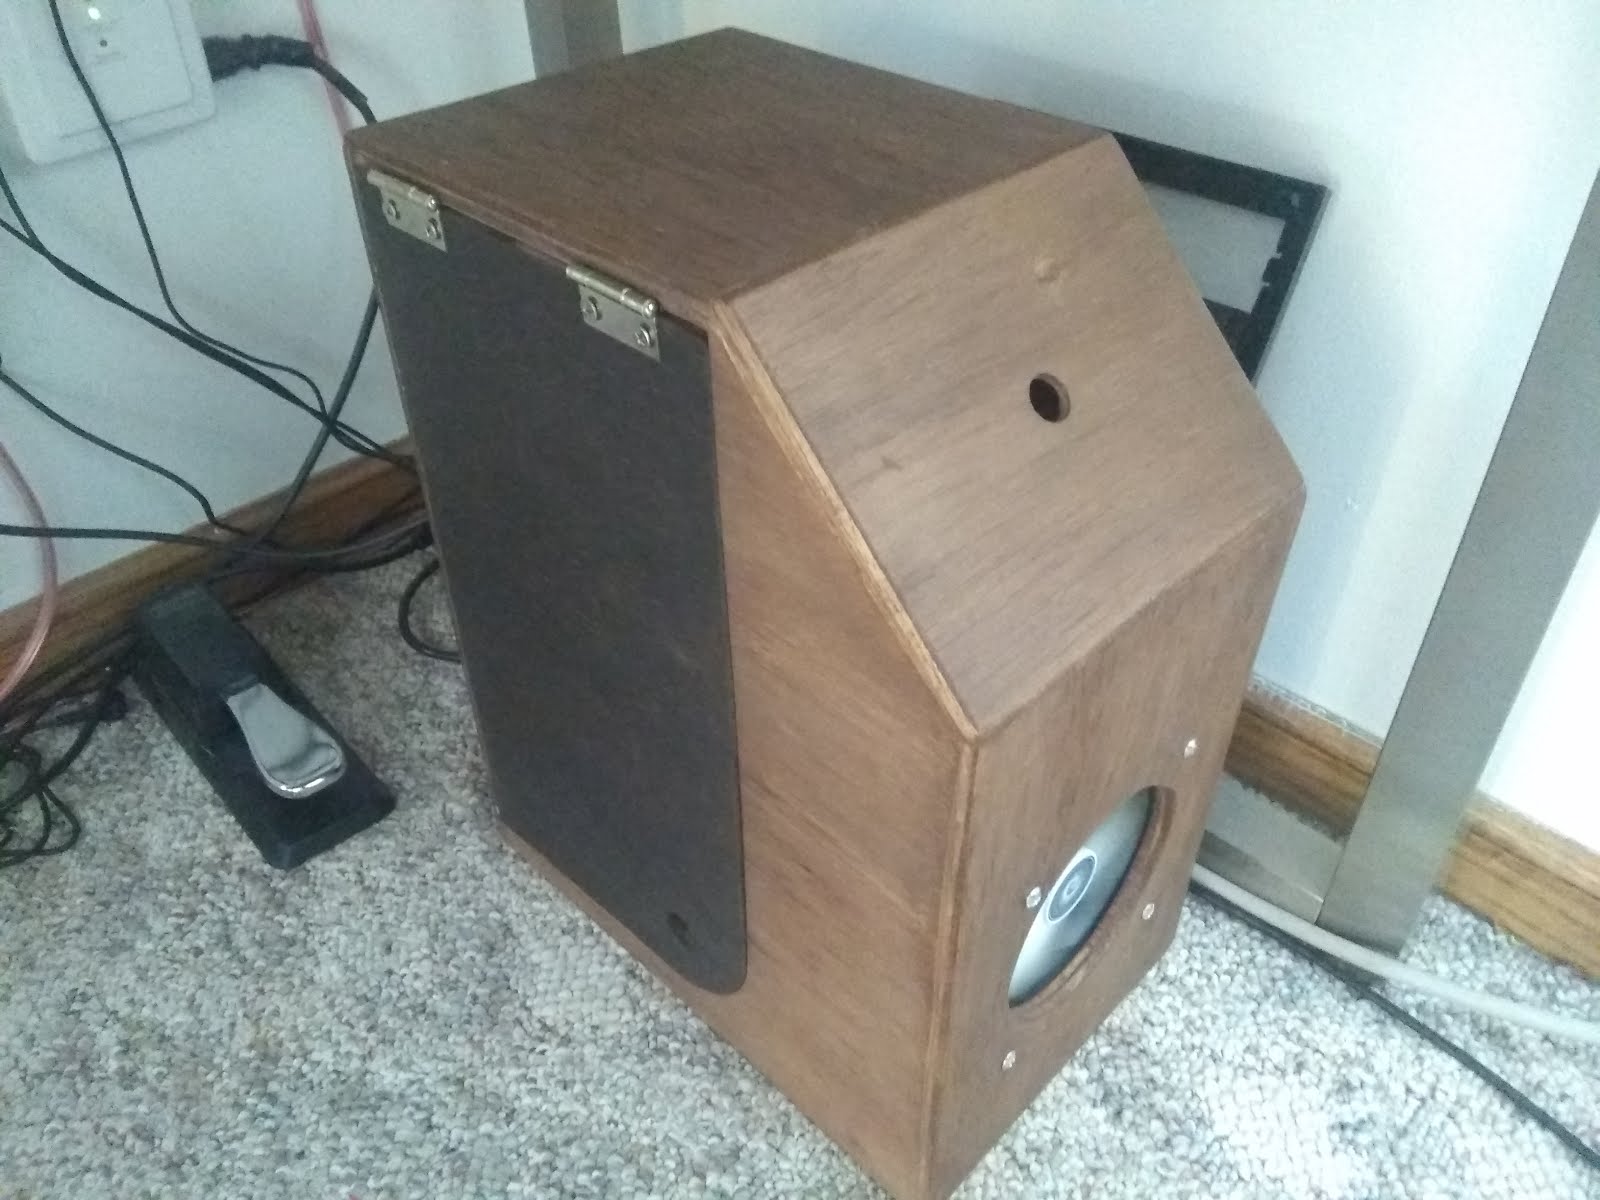
I designed it so that the side panel would swing open for easy access to the internals, and gave it a stylish lil curve. I stained the main body walnut and the door a darker espresso to give it +5 to style.


Mounting the door with hinges went smoothly. I planned to add a latch to the bottom but the fit is snug enough when closed there was no need.

Side-by-side comparison to the old case: both micro ATX, so the old one wasn't a particularly large case to begin with. This one, however, eliminated the majority of the unused space, at no cost except for the DVD drive.


Mounting the motherboard was easier than expected: I cut rings out of a cheap pen to use as motherboard spacers and screwed it directly into the wood. It's quite secure, although I still don't know if I'd entrust it to FedEx and expect it to survive perfectly.


The GPU was somewhat trickier, because of the way PCIE devices mount to the rear of the case. I ended up with a somewhat janky block tacked on to the rear, but hey, it works.

Added a hard drive and fans and turned it on with a screwdriver. It didn't work. Panic began to set in. I realized the PSU was still off, sheepishly flipped the switch, and it worked fine.

While waiting for the new switch to arrive in the mail, I got tired of turning it on with a screwdriver, took off the front panel of the old case, and used that power switch for a couple weeks in an exceedingly odd setup, but it worked fine.
It looked like a birdhouse with the hole in it and all, but hey, it worked!

Finally got the power switch and a second Arctic F12 Silent fan to install, and it was pretty much complete. The switch works like a charm and the fans keep it very quiet. It's not quite silent, but it's about a quarter as loud as the previous case/fans combo, which is great for recording music.

The LED switch at night looks pretty alright, and is the only exception to the otherwise "non-RGB-ness" of this build.

I finally caved and got a 480gb SSD drive, which was just large enough to migrate everything from the previous drive to. It makes it just a tad quieter and makes it approximately twice as fast at bootup and opening files, which is a lovely upgrade, and when I fill it up I can always add the 1tb HDD back to store files.


To recap the budget, here's a quick rundown:
- $15 or so for supplies to build the case
- $15 for two Arctic fans
- $60 for the 480 gb SSD
- $250 for the original PC, which included everything else, as well as a nice router and a subpar monitor (worth at least $50 for the two)

$250-$300 is comfortably within console budget, but with all the triumphs and headaches that come with being a PC instead. It's not quite as compact, but it's a lot quieter and more unobtrusive than most gaming computers out there, while still being a competent all-around machine that definitely punches above its weight class in terms of performance per dollar.
Hope you've enjoyed the read, and maybe that my build will help or inspire someone else's in a little way as well!

very good pc case you got there i am also a gamer and i have thermaltake verse n21 modified case showboxappguide.com
ReplyDeleteBlog gave us useful information to work. You have done an amazing job! trigidentities.info
ReplyDeletethis is a very good and interesting site full of information..showbox apk file for android
ReplyDeleteAll three were being cautious to remove their hands and arms before it chewed up the limbs to the end. how-to-start-a-woodworking-business.s3.amazonaws.com
ReplyDeleteNice to be visiting your blog again, it has been months for me. Well this article that i've been waited for so long. I need this article to complete my assignment in the college, and it has same topic with your article. Thanks, great share. BYDLENÍ
ReplyDeleteA great website with interesting and unique material what else would you need. mobdro hd
ReplyDeleteA wood-burning stove or a wood stove has several uses. Despite the developing technology that we have today, the efficiency of these wood stoves are still unquestionable. The world today now has gas stoves and even electric stoves. There are even ones which have touch features just like how you operate your iPhone. If you would have the chance to talk to the people from generations before ours, the hi-tech devices which were invented in our generation never touched their imagination. Still, it is very good to know that a lot of people today are still using wood stoves in their homes. That could be because not all people are fond of embracing technology. It could also be because it has been their habit to use wood stoves in their homes or in their businesses. you need to know
ReplyDeleteI am appreciative to the essayist for composing this.
ReplyDeleteTotal Pallet Management
I think I have never seen such blogs ever before that has complete things with all details which I want. So kindly update this ever for us. Kernbohrungen Zürich
ReplyDeleteWith Ipe decking, California residents enjoy the look and feel of real wood on the decks of their homes and the lasting natural beauty that it brings. You can get the Ipe boards in lengths of 6 feet to 20 feet, although if you need planks longer than that for your decking, you can place a special order for them.www.buyipedirect.com
ReplyDeleteThis comment has been removed by the author.
ReplyDeletePlastering services are always in demand. Whether it is a simple home improvement project or renovation of your bathroom, plastering plays a very important role.
ReplyDeleteKernbohrungen
Great article Lot's of information to Read...Great Man Keep Posting and update to People..Thanks building monad terrace Condos
ReplyDeleteDrywall's adaptability makes it suitable for both residential and commercial spaces
ReplyDelete