![[Mattwins]](https://blogger.googleusercontent.com/img/b/R29vZ2xl/AVvXsEgEy2dr7hX_nicvRhz4bxUFEoP_GPqBybD6lc0fwB83oIJo5s3tR3Qal9gBewkZ2l_egelA4NJ4SaMEWcs1l4QzdVYNdDcLO-8p8s4GEVdcMHt9xVrbDc2tGNaiOFFshWzgrUnPiNBUBfkU/s1600-r/logo2+-+Copy.png)

The guitar business is one deeply entrenched in a sort of mysticism surrounding the "right" paints for the "right" sounds, and what's "right" is inevitably old lacquer or some even more cancerous alternative.
But if you're reading this, you probably already knew that - my SEO isn't terribly great so you'd have to be looking long and hard for someone so charming and modest, or at least devoid of snooty preconceptions about guitar paint. On to the helpful part!

Go to your local Home De(s)pot or Lowe's and look around at the spray paints. A full aisle, almost all enamel and acrylic at appealing sub-$10 price points. Unfortunately, there's a real shortage of info on using those easily accessible paints to do a burst finish, since the people who know their guitar shit and the people who have snooty preconceptions and lots of money to spend on guitars are usually one and the same.
Fortunately for you, my marginal cost of labor is cheap as hell right now so I don't mind using imperfect materials and writing long blog posts 'bout it so you can look at the ads without an adblocker so I can afford macaroni live a generally more successful, interesting life.

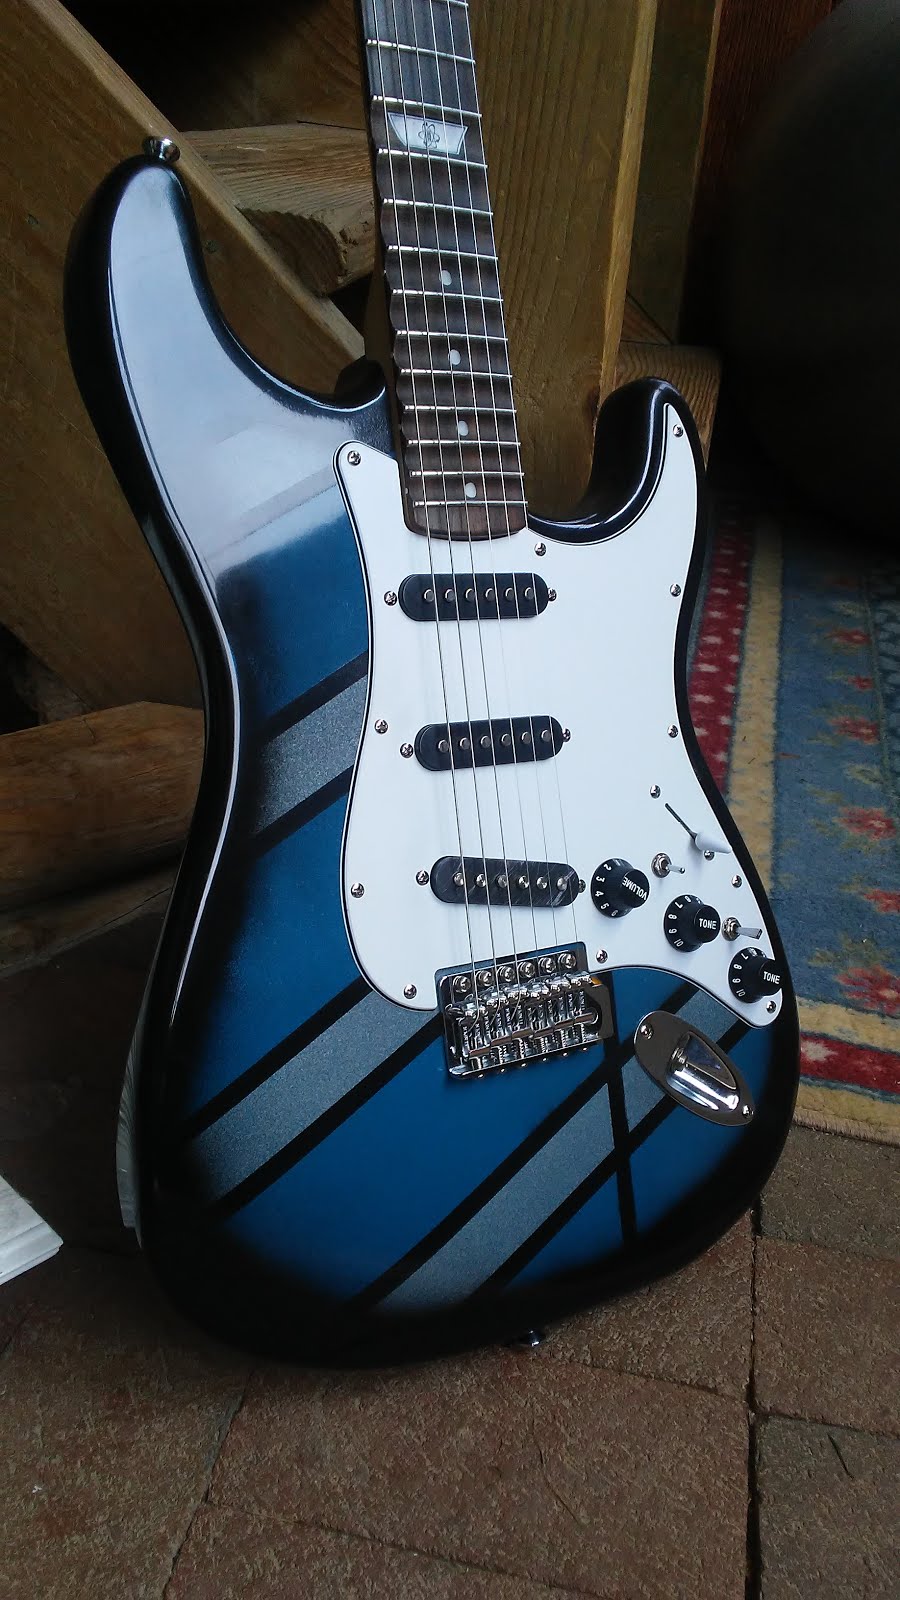
For this project I'm once again modifying Stripes the Strat - it had an enamel clear coat base, which I scuffed lightly with 400 grit sandpaper first to help the new paint stick. The paint I used was simple Rustoleum black gloss enamel, and Rustoleum clear gloss enamel over it.

First step is to cut out a piece of cardboard a bit smaller than the body, which will prevent overspray from hitting the center of the body. This is optional, but it's definitely a good idea with enamel especially, since it doesn't blend like lacquer.
Take care to get the shape of the cardboard as accurate as you can - it'll make it look much nicer in the end. You'll want some way to attach the cardboard cutout about 2" away from the body - this makes your burst tight and controlled but still, you know, a burst, not a line.
 |
| The back was still a sunburst, and looks much better in matching black |

With cardboard template attached, painting the burst is simple enough - holding the can about 8" away from the body, trace around the edges of the template.
The angle of the can is important - if you angle it inward, the burst will fade more gently, but this may not look great with enamel, and it increases chances of splatter and messiness. Angling outward will make a tighter burst, more of a line. Around 90 degrees is a safe start - practice on some cardboard scrap until you're comfortable painting the real thing!

After that, it was time for the clear coat, which made it look a billion times better. This isn't different from any other clear coat, then polishing, which I'd recommend this tutorial for, if you haven't read it already: http://www.instructables.com/id/Appling-a-Mirror-Finish-by-hand/.

That's all I've got for this one - well, and a couple more pretty pictures:


Very clever, burst technique. Can't wait to try it.
ReplyDelete