![[Mattwins]](https://blogger.googleusercontent.com/img/b/R29vZ2xl/AVvXsEgEy2dr7hX_nicvRhz4bxUFEoP_GPqBybD6lc0fwB83oIJo5s3tR3Qal9gBewkZ2l_egelA4NJ4SaMEWcs1l4QzdVYNdDcLO-8p8s4GEVdcMHt9xVrbDc2tGNaiOFFshWzgrUnPiNBUBfkU/s1600-r/logo2+-+Copy.png)

My latest project guitar has been hugely interesting, trying to recreate a 10 year journey of one of the most famous guitars of all time. Eddie Van Halen's Frankenstrat is famous for its complex and semi random design, but isn't too terribly difficult to make if you know what to do.


I started out with a 1978 Harmony body, a cheap Strat clone made in Japan. It's a very lightweight and resonant body, but really any Stratocaster style body will do. This one, being so old, had some cracks in the wood and finish, so I repaired the damage with wood glue and a toothpick. I also filled the holes with wood glue and sawdust, although not strictly necessary.
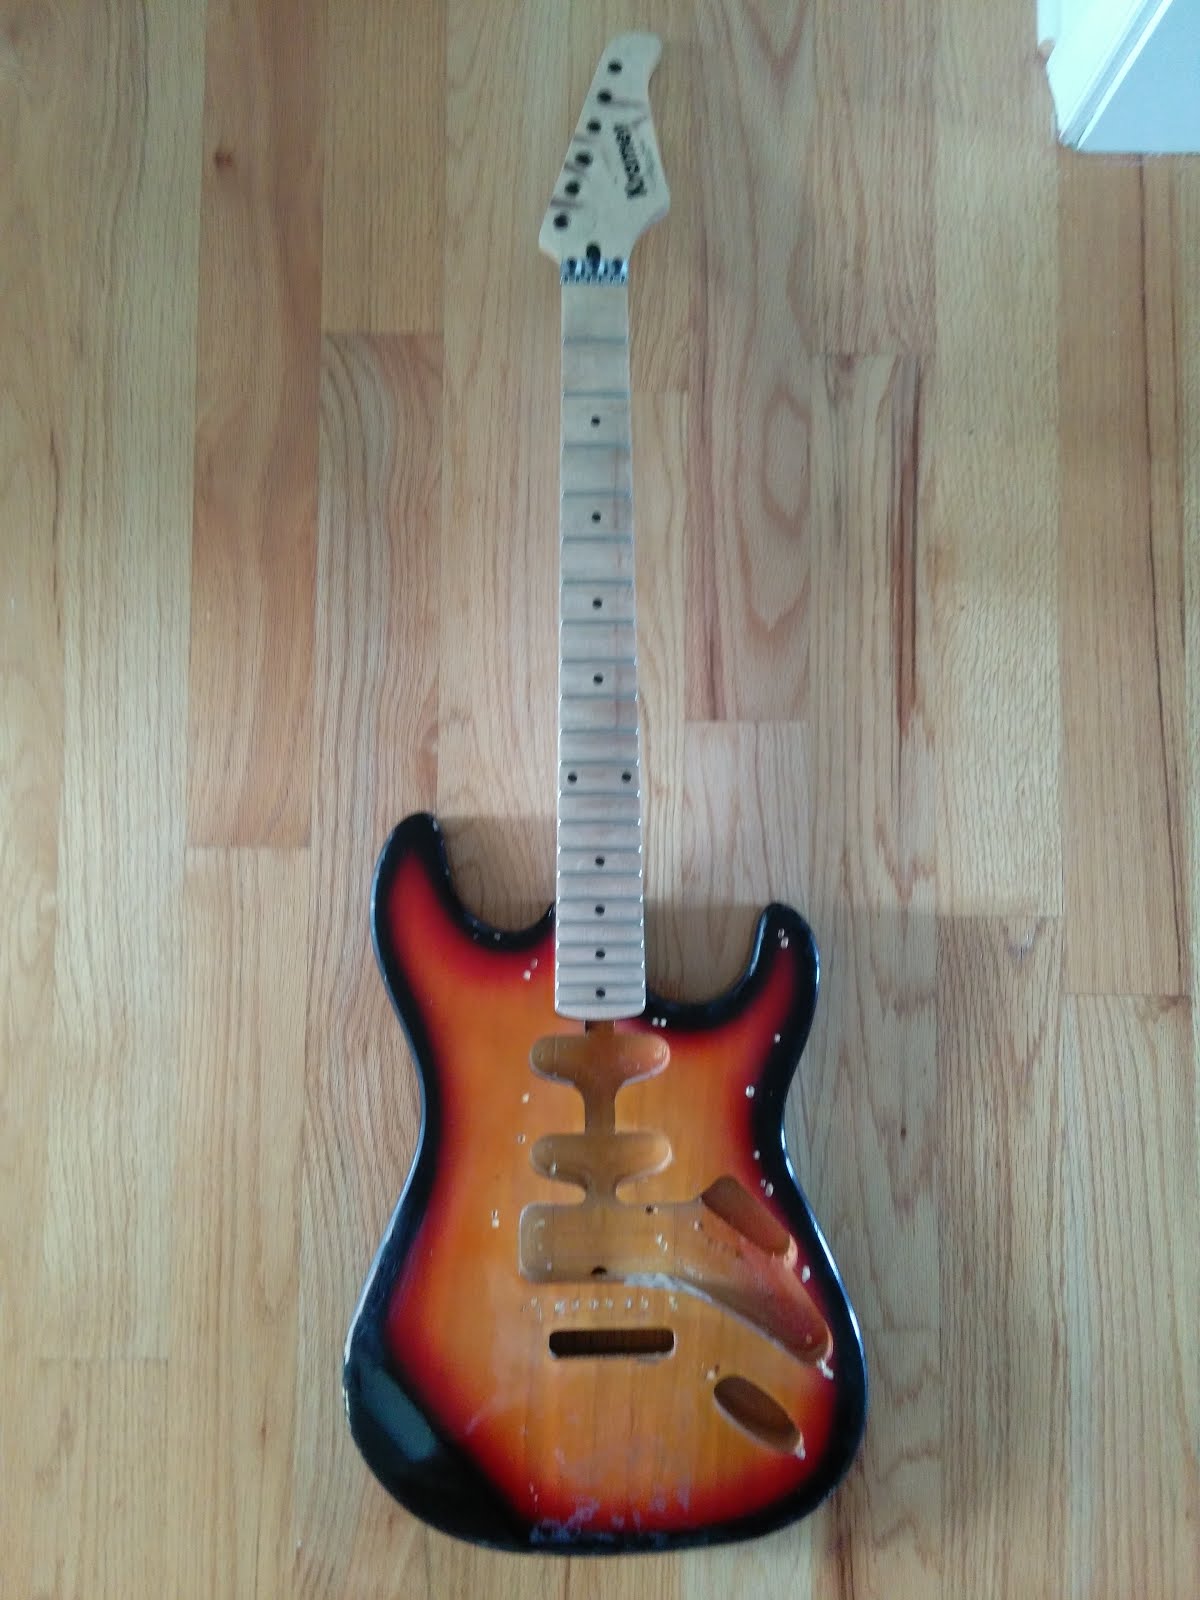
Test-fitting the neck, a faux Kramer with a tilted headstock and scalloped fretboard. A neck with a locking nut is important for keeping the Floyd Rose in tune, although not 100% necessary.

Looks like it'll need a little trimming and shimming in the neck pocket later on.

Sanded down the body to rough up the paint and add some wear, this helps the paint to stick and takes out some of the scratches and dents if you're working on an older body.

Shot it full of black paint/primer first - if you're spraying on raw wood, primer is probably necessary. If spraying on top of another paintjob like a sunburst, you can probably go straight to black paint.

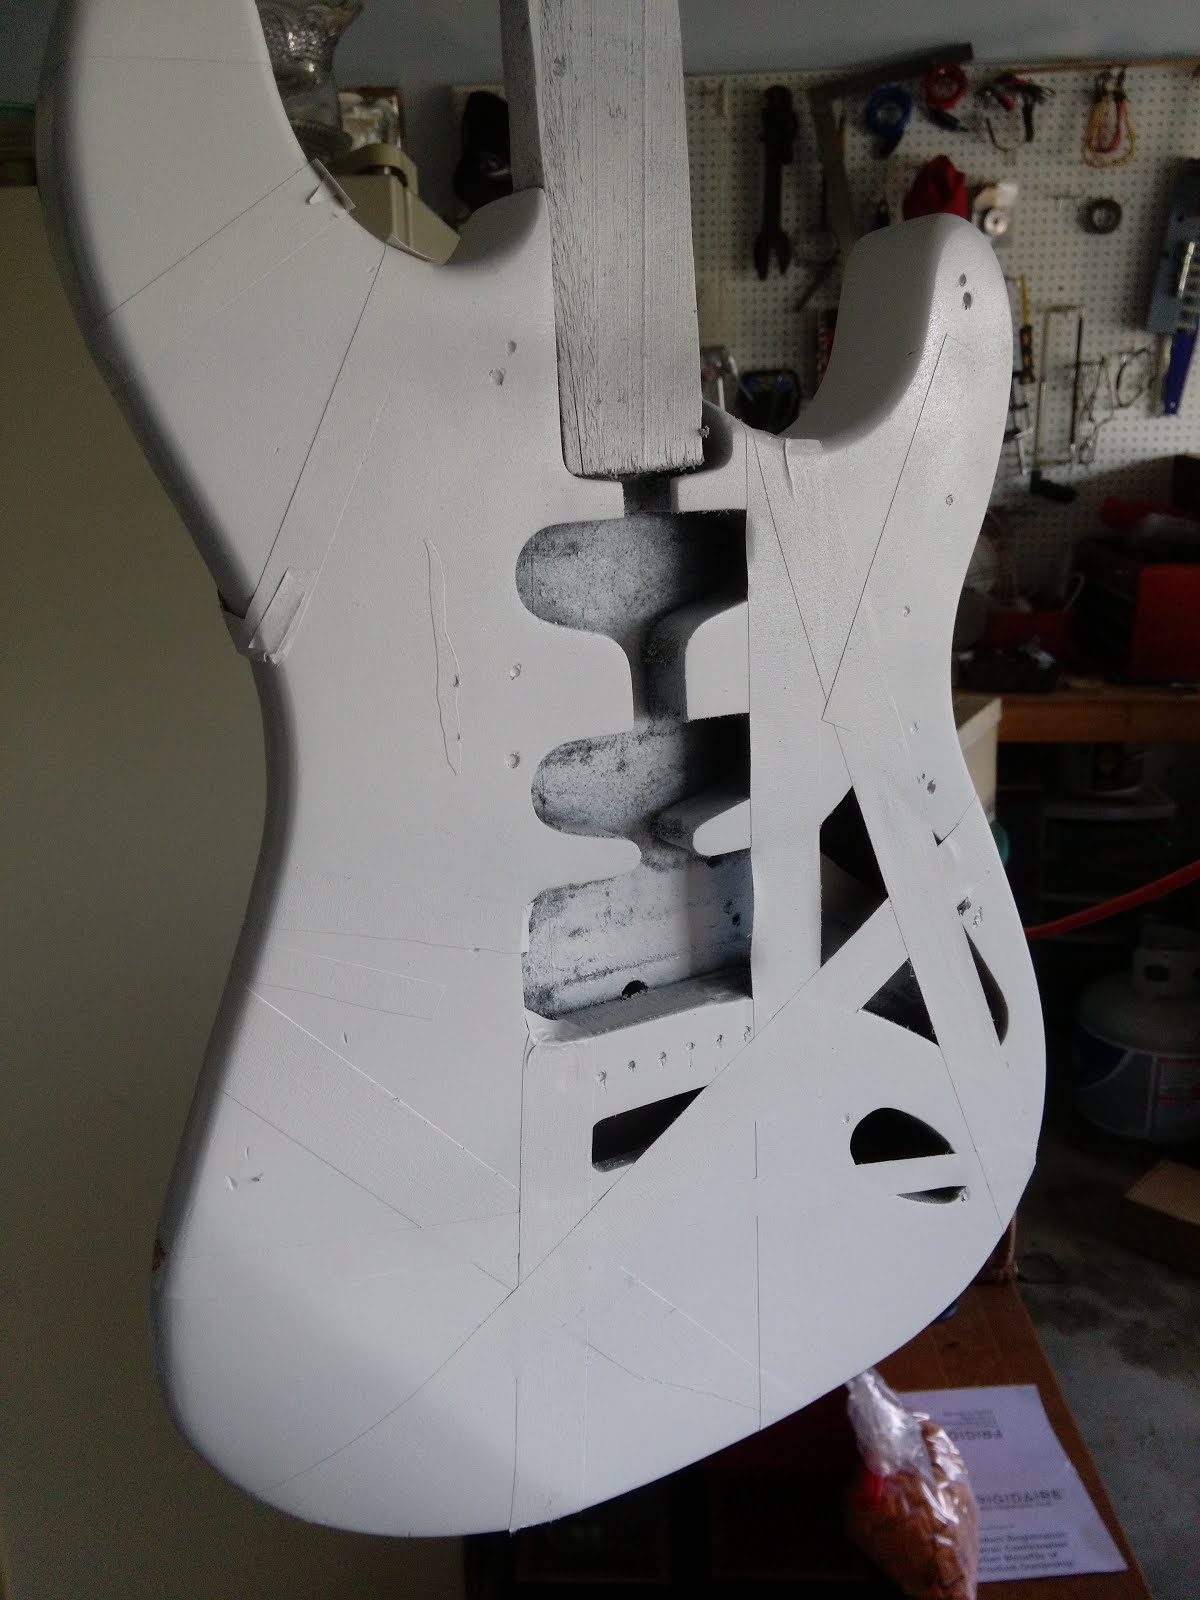
I decided now to go ahead with the Floyd Rose post installation before going ahead with the whole paintjob. To install the posts, carefully drill holes straight down into the wood, starting with small pilot holes and expanding to 1/4". A drill press is helpful for making the holes straight, but I did fine with a hand drill, just take your time.

Some small chipping when drilling the largest size, but not a big deal.

After smoothing out and wiping down the primer black.

Next up, gloss black. This is where I messed up; being cheap and using only crappy half empty, rusted black spray paint. It's not the end of the world, because black is a pretty small part of the final finish - but one or two strong coats of a fresh gloss black will look more professional, yes even after relic-ing.


After the mediocre black paint was applied, and test fitting the parts.

Unhappy with the black, I sanded through most of it and back to the primer and some of the wood. This did create a very smooth base for everything else to come, but makes for a very splotchy black. I decided to roll with it and see what personal character it adds to the Frankenstrat.


Back tape pattern

After taping, I hit it up with a white primer coat. I think it would go as well or better going straight to the white gloss coat, that's your call. Primer coats seemed mostly to add inconsistency to the paintjob and weren't really necessary to help it stick.

Going through the pickups. Using this MiM Fender neck pickup for the neck and a Jackson humbucker for the bridge, use whatever makes you happy!

Got new tuners in the mail and installed them no problem. For $10, these tuners by Musiclily are an unbeatable value - they seem to work just fine, and really fine tuners aren't necessary with a locking nut.

Give the body that lovely gloss white coat now.
Leave it dry at least an hour before pulling off the tape to be safe.


All pulled off and cleaned up - next take some fine sandpaper to it and smooth out the paintjob and the little ridges between stripes.
Now remember - Eddie used it for a few years in its black and white form before adding the red. That means we've gotta make it look like it was gigged and gigged hard!

Time to relic it up! I took a pocketknife and some sandpaper to work on it. I'd recommend the pocketknife but not much sandpaper - sandpaper tended to just wear through the color and not give the right kind of look anyway. Just be careful not to pockmark too much with the knife unless that's the look you're going for!

The back turned out pretty nice, and the cat approves too.

Time to tape up again! This is the pattern for the front.

And the back pattern.

Once you have the tape on, hit it with bicycle red, just like with the white.

After the first strong coat: notice the black stripes still sticking out some. If you want it just like Eddie's Frankenstrat, you want the black stripes mostly covered but still a little bit darker than the rest of the red.

After another coat. Looks like the dark red is just the right consistency to me!

Give it some time to dry, then it's the fun part where you unwrap the present!

Looking pretty great to me! We see the wear from the earlier layer showing through, but the red is still all shiny. Next step, we're going to relic again, then assemble and rock! But for today, I'll let it cure in peace.

Hi,
ReplyDeleteCan you bring more informations about the paint you used ? (Color, brand etc ... ) ?
Sure! Eddie used Schwinn bicycle red from a spray can, and similarly I used Rustoleum enamel spray cans. Just primary black, white, and red, all in gloss finish.
Deletelook at my listing on ebay I sell a kit to build these and it lists types paint etc
Deletethanks for this, I'm 13 years old and my brain can't quite wrap its head around Frankie's pattern, and this was so helpful. My Frankenstrat replica turned out awesome!
ReplyDeletethis was really helpfull thank you :)
ReplyDeleteFirst of all thank you so much for sharing this post. You provide the best information about Best Guitar Kits. If you want more information please visit us at www.solomusicgear.com.
ReplyDeletewas wiring the things hard?
ReplyDeletewhat tape did you use and their dimensions ?
ReplyDelete